Saturday, February 2, 2013

Patch from Scratch

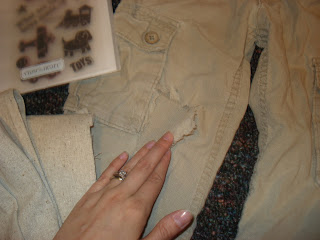
 I have a little Boy and so inevitably I have to fix those holes in the knees. These linen pants are a favorite so I made a patch from scratch.
 What you need: Heat 'N Bond, Iron, fabric, some stamps and paint for fun.


 This is me- no measuring just getting into it and cutting the fabric for the patch, a rectangle.
 Can you see the sad rip. :(


 Follow the directions on the Heat 'N Bond


Creative time! Decorate the patch. I used a few stamps. I would have used paint instead of just ink (ink washed out and now the stamp is very light) 


 Small cuts in the corners and fold, use the high tech finger nail and run it along the fold to set it.


Place paper behind the hole.
 Iron on the patch.


 Inside out, more Heat 'N Bond.


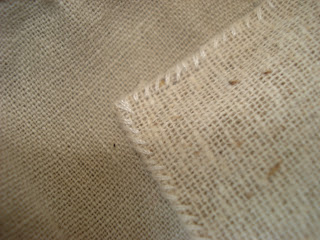
Now Some fun hand sewing around the patch.


 I added some embroidery thread X's


 Fun Patch from Scratch!


Old craft, New craft

I love going to thrift stores, or my closet and finding old craft projects and making it new again. My friends and I have a little craft club and this kind of crafting is great for those nights. It would also be a great activity for young crafters. Here is the before and afters of a wooden owl redone for my boy's room.
Before:
After:
And here are some wooden hearts redone for Valentine's day decor.
Before:
After:
It's fun to see the potential in old crafts to become new again. Have fun and tell us about some of your redone crafts!

M

Daisy head masie

I always have scraps of material that are great for rolling into flowers. And it's great vamping up silk flowers. I like this how to on this site. Now if only I had a girl. :)-M
Great baby shower gift: Blanket rolled up with head band and flowers around it.

Thursday, January 24, 2013

Choose Your Ugly {A simple and cheap way to tie miss-matched furnishings together}

Alright, I thought I'd just take a moment and apologize for the LONG absence we took from our blog. Aside from all petty excuses (moving twice for me, Michelle loosing her camera... etc) we do realize that we made it pretty close to a YEAR of no posts on our blog. And that is why we have this blog more for fun than for business. Just to share the moments we get to craft and beautify amidst our busy mommying days.
Forgive us? Good. Because we're back and ready to blog away on some fun things we've been doing/ making.

>>Anyway
We got a few furniture items from people to help us out when we got married and when we moved. And since this isn't the time in our lives to be buying expensive new furniture, we took what we could get!
Red couch from Craigslist= $30.00 gift from my parents:

A turquoise recliner from my parent's neighbors who were getting rid of it:

And some throw pillows that we got from our wedding:

Then there was this rug we bought with a bonus from work for like $70.00 from Walmart. It was tan with green and brown leafs on it.

And as you can see they were all pretty mismatched and had nothing to do with each other. Except maybe that the rug and pillows both had leafs on them.
So what came to my mind was something I learned in my first sewing class in college:

I don't know if that's an official term, but that's what my teacher called it. It's where you choose the colors you want to use for a project (like the picture above has some bright green, yellow, blue, and pink squares. and then it has a piece of fabric that has all those colors together to tie them in. Like choosing two fabrics you love and then one that ties them together that might not be the best fabric by itself, but looks great in a small quantity for the purpose of making the end product look great :)
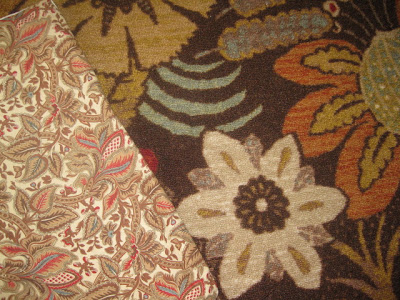
So I applied it to my situation. Here I had all these different colors and patterns to work with that would go in my living room and I had the challenge to bring them together with one great piece. I chose pillows. I'd make pillow covers for the red pillows that would have every color in it (Red, tan/ brown, and turquoise). And this is what I found:

I followed the pillow slip cover tutorial that Michelle posted at the beginning of our blog, and this is what the pillows looked like in our living room:


It worked ok, except my husband complained about the fabric all the time ("it's grandma fabric") and the leaf pillows ended up looking better in our room on our bed, AND we got a new rug because of a sale ($30.00 for an area rug, hall runner and door mat). The rug became our new "ugly" as it tied everything together even better than the pillow cover.
(camera changes colors a bit...)
And the pillow covers I made went away because they clashed with the rug (too busy looking)

So I made some new pillow covers that were plainer and just helped the rug fit in that much more. It was a off white pattered fabric and I used a different Tutorial for make the slip cover this time (Five minuet cushion). (I'll do another post on that later).
And this was the end result of our living room :)
I'm going to frame that mirror and post about that sometime too.


Plus we recieved some tan and turquoise curtains that helped the overall look as well. So you don't have to buy brand new furniture sets and fancy decorations to make a room have a beautiful color scheme, Use the quilting trick and save some money!

Friday, May 4, 2012

Mother's Day "Boast Badge"


These are so simple and easy to make and you can totally customize them anyway you like!! The best part is that you can use scraps from anything and everything in your craft closet to make them (scraps of ribbon, paper, string, feathers, beads, and on and on...).
Gather a ton of supplies and get started!

For sure you'll need a strip of paper about 23' long and 2-ish' wide. And two circles about the size of the top of a can, and some hot glue (or other glue of preference).Scroll on to see how I made mine, but remember, these are totally customizable to fit your mother's style! You can do anything!
I'm making two, and the pictures are a combination of each.

First I made the paper ribbons with the "mother stats" by using text boxes on Word and playing around with different fonts and sizings. (Close up from final photos)

Fancy cut and acordion fold your strip of paper.

Then glue the ends together to make a circle. Set aside.

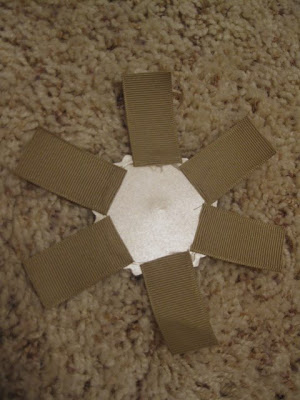
Arrange your ribbon and glue it onto the front of one circle, also glue a loop of string (for hanging up to display after use).

Then take your other circle and glue it on top of the other circle with the ribbon and string glued to it.

Then glue your accordion circle to the top of that.
Then I added some feathers (that I got off an old bouquet in the dumpster).

Then I took another circle cut the same size and glued my decorative ribbon to the back of it.


Then turn it over and add your embellishments to the front. I did a smaller circle of scrapbook paper and an old necklace pendant that had a picture of me, my mom, and sister :)

Then glue it on top of the accordion circle that's attached to the ribbon arrangement, and add any other embellishments you want.

And you're done! Quick, easy, and beautiful.