

Formally {Your Crap, My Craft}
Wednesday, February 29, 2012
LOVE on The Couch
Well I have these little pillows that needed a new look. I had some sturdy remnant fabric and Valentine's day was around the corner. That made for some crafting LOVE.


Tuesday, February 28, 2012
Pillow slip cover tutorial
#1 Iron fabric. I am using 2 different fabrics, the fabric for the front has the pattern and back fabric in off white.
#2 Lay pillow on your front fabric, fabric right side down.

#3 Leave a half inch to an inch of fabric around the pillow

#4 Cut fabric.

#5 Now its time to make the overlap for the back. This next step can be done two different ways. Option one is best for your first try: Lay front fabric on the fabric for the back of pillow. Notice the ruler, cut this fabric about 3-4 inches longer on the width then the front fabric. Cut length the same as front fabric. You will end up with 2 rectangles with the back fabric a little longer.

#6 Cut back fabric in half.

#7 Sew a hem on the sides you just cut. Option 2 lets you skip this step by using the salvage edge.

#8 Option two (which is what I did), I like to use the salvage edge as my overlap. Like step 5 you need to leave a few inches on the width, AND on the length, the length edge is the salvage. The salvage side doesn't need to be hemmed. Basically your back fabric is larger than you front fabric. Then cut in half. Rotaite salvage edge until they touch in the middle. It's ready for pining.

#9 Now is a good time to add a cute ribbon to the front fabric.

* I had this ribbon left over from Christmas; it has wire in it which made it easy to fold.

#10 You could do this with non-wire ribbon or fabric, just use your iron and pins to keep its shape. * Sew it on.

#11 Line up the corner of the front fabric and one half of back fabric, right sides together.

#12 Lay down the other half, lining it to the other corner let it overlap in the middle.

#13 Pin the overlap together also pin all around. Sew a 3/4 inch around all the edges. (sew a rectangle) :}

#14 Fun part: turn slip cover right side out and pull over your pillow.

* Front, look'n good.

* Back, nice overlap.
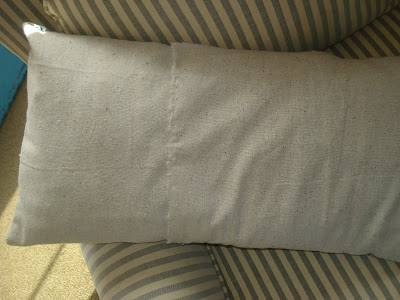
* Next time you could change it up and make the "back" the "front"(overlap is on the front).

 *Enjoy your fun new pillow! -M
#2 Lay pillow on your front fabric, fabric right side down.

#3 Leave a half inch to an inch of fabric around the pillow

#4 Cut fabric.

#5 Now its time to make the overlap for the back. This next step can be done two different ways. Option one is best for your first try: Lay front fabric on the fabric for the back of pillow. Notice the ruler, cut this fabric about 3-4 inches longer on the width then the front fabric. Cut length the same as front fabric. You will end up with 2 rectangles with the back fabric a little longer.

#6 Cut back fabric in half.

#7 Sew a hem on the sides you just cut. Option 2 lets you skip this step by using the salvage edge.

#8 Option two (which is what I did), I like to use the salvage edge as my overlap. Like step 5 you need to leave a few inches on the width, AND on the length, the length edge is the salvage. The salvage side doesn't need to be hemmed. Basically your back fabric is larger than you front fabric. Then cut in half. Rotaite salvage edge until they touch in the middle. It's ready for pining.

#9 Now is a good time to add a cute ribbon to the front fabric.

* I had this ribbon left over from Christmas; it has wire in it which made it easy to fold.

#10 You could do this with non-wire ribbon or fabric, just use your iron and pins to keep its shape. * Sew it on.

#11 Line up the corner of the front fabric and one half of back fabric, right sides together.

#12 Lay down the other half, lining it to the other corner let it overlap in the middle.

#13 Pin the overlap together also pin all around. Sew a 3/4 inch around all the edges. (sew a rectangle) :}

#14 Fun part: turn slip cover right side out and pull over your pillow.

* Front, look'n good.

* Back, nice overlap.

* Next time you could change it up and make the "back" the "front"(overlap is on the front).


Subscribe to:
Posts (Atom)